7 Managing Appliances
Note
Only the appliance models OPENVAS SCAN VIRTUAL, OPENVAS SCAN G10, OPENVAS SCAN G30 and OPENVAS SCAN G90 can be managed with OPENVAS SECURITY INTELLIGENCE.
7.1 Connecting Appliances
There are two ways to connect an OPENVAS SCAN appliance to OPENVAS SECURITY INTELLIGENCE:
- Connection is initiated by OPENVAS SECURITY INTELLIGENCE
The connection is established by providing the URL and the HTTPS fingerprint of the appliance in OPENVAS SECURITY INTELLIGENCE. This method is used for appliances that are located in networks that allow inbound communication.
This connection mode is called “inbound”.
- Connection is initiated by the appliance
The connection is established by storing the URL of OPENVAS SECURITY INTELLIGENCE on the appliance and then retrieving the appliances available for connection in OPENVAS SECURITY INTELLIGENCE. This method is used for appliances that are located in networks that only allow outbound communication.
This connection mode is called “outbound”.
Appliances connected via outbound mode can send their scan data to OPENVAS SECURITY INTELLIGENCE (see Chapter 6).
7.1.1 Preparing the Appliance
7.1.1.1 Preparing the Appliance for Inbound Mode
An appliance can be prepared for connecting via inbound mode as follows:
Open the GOS administration menu of the appliance.
Select Setup and press Enter.
Select Services and press Enter.
Select Remote Management and press Enter.
To enable remote management, select Remote Management and press Enter.
If necessary, select Mode and press Space to change the mode to
inbound.→ A warning informs that changing the connection mode will terminate any existing pairing with OPENVAS SECURITY INTELLIGENCE.
Select Continue and press Enter.
→ The mode is set to
inbound.Select Save and press Enter.
→ The appliance can now be connected to OPENVAS SECURITY INTELLIGENCE via inbound mode (see Chapter 7.1.2).
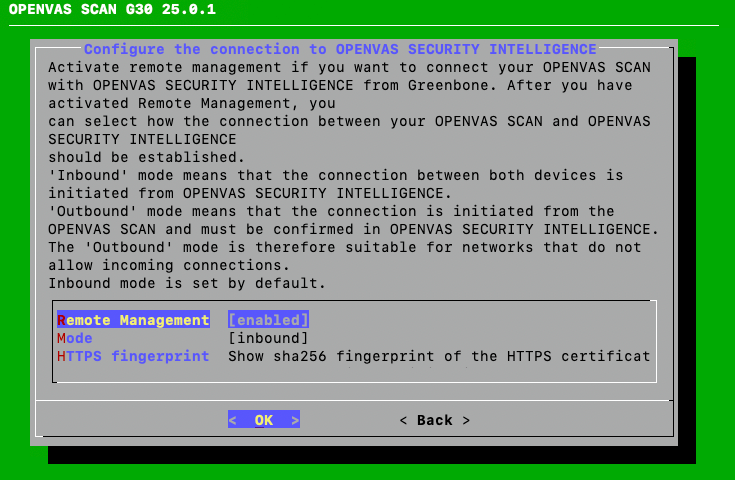
Fig. 7.1 Preparing the appliance for inbound mode
7.1.1.2 Preparing the Appliance for Outbound Mode
An appliance can be prepared for connecting via outbound mode as follows:
Open the GOS administration menu of the appliance.
Select Setup and press Enter.
Select Services and press Enter.
Select Remote Management and press Enter.
To enable remote management, select Remote Management and press Enter.
If necessary, select Mode and press Space to change the mode to
outbound.→ A warning informs that changing the connection mode will terminate any existing pairing with OPENVAS SECURITY INTELLIGENCE.
Select Continue and press Enter.
→ The mode is set to
outbound.Select OPENVAS SECURITY INTELLIGENCE Address and press Enter.
Enter the domain name or IP address of the OPENVAS SECURITY INTELLIGENCE instance, followed by
:443for the port, in the input box and press Enter.Select Save and press Enter.
Note
If the appliance was already connected to an OPENVAS SECURITY INTELLIGENCE instance, a warning asks whether the current pairing should be released first.
→ The appliance will try to connect to the instance of OPENVAS SECURITY INTELLIGENCE that the domain name/IP address was provided for. The appliance can now be connected to OPENVAS SECURITY INTELLIGENCE via outbound mode (see Chapter 7.1.3).
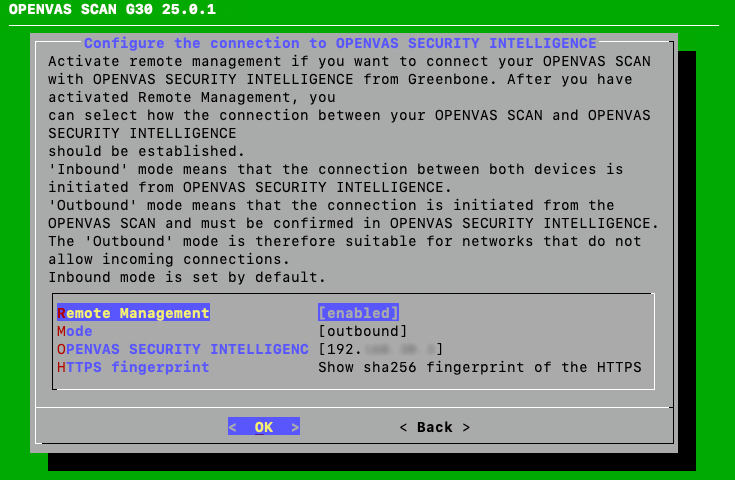
Fig. 7.2 Preparing the appliance for outbound mode
7.1.2 Connecting from OPENVAS SECURITY INTELLIGENCE to the Appliance
An appliance can be connected to OPENVAS SECURITY INTELLIGENCE via inbound mode as follows:
Select Scan Unit Management in the menu.
Click Add appliance.
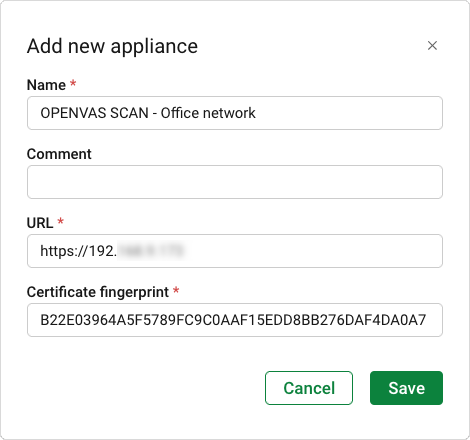
Fig. 7.3 Adding an appliance via inbound mode
Fill in the input boxes:
- Name
The name can be chosen freely. A descriptive name should be chosen if possible.
This input box is mandatory.
- Comment
The optional comment allows specifying further details and background information.
- Host
Host name or IP address of the appliance that should be connected.
This input box is mandatory.
- Certificate fingerprint
SHA256 fingerprint of the appliance’s HTTPS certificate.
The fingerprint can be found in the appliance’s GOS administration under Setup > Services > Remote Management > HTTPS fingerprint (see Chapter 7.1.1.1).
This input box is mandatory.
Click Save.
Note
A request is sent to the appliance and the fingerprint of the certificate is verified.
The appliance is automatically paired. During pairing, the connection is authenticated and the pairing endpoint is closed. No further pairings to the same IP address are possible.
→ The appliance is displayed on the Scan Unit Management page.
The connection status is Connected. Role, OS version and feed version are displayed in the table.
7.1.3 Connecting from the Appliance to OPENVAS SECURITY INTELLIGENCE
An appliance can be connected to OPENVAS SECURITY INTELLIGENCE via outbound mode as follows:
Select Scan Unit Management in the menu.
Click Available appliances.
→ The appliances that the OPENVAS SECURITY INTELLIGENCE URL has been added for are displayed.
Note
By clicking
 , appliances can be removed from the list.
This can be used for appliances that are no longer available or have been switched to inbound mode.
, appliances can be removed from the list.
This can be used for appliances that are no longer available or have been switched to inbound mode.Appliances that are still trying to connect, contact OPENVAS SECURITY INTELLIGENCE every two seconds. They will reappear in the list when the dialog is opened again, even if they were previously removed from the list.
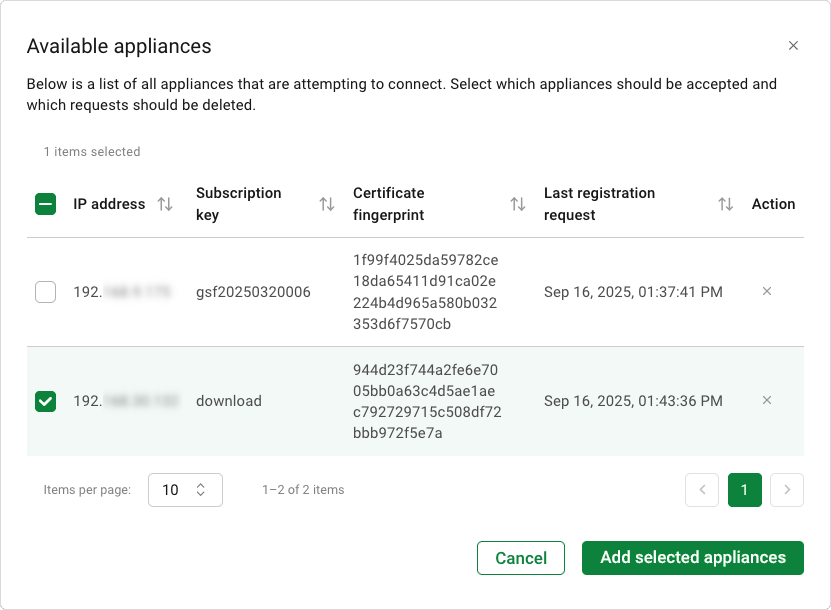
Fig. 7.4 Adding an appliance via outbound mode
Activate the checkboxes of the appliances that should be added.
Click Add selected appliances.
Note
A request is sent to the appliance and the fingerprint of the certificate is verified.
The appliance is automatically paired. During pairing, the connection is authenticated and the pairing endpoint is closed. No further pairings to the same IP address are possible.
→ The appliance is displayed on the Scan Unit Management page.
The connection status is Connected. Role, OS version and feed version are displayed in the table.
7.1.4 Information about Disconnecting Appliances
- Connecting an appliance to a different OPENVAS SECURITY INTELLIGENCE instance
When an appliance should be connected to a different OPENVAS SECURITY INTELLIGENCE instance, the appliance should be unpaired first from the old instance (see Chapter 7.3.5).
This ensures that the appliance is in a clean state, ready to be paired with the new instance.
- Permanently retiring an OPENVAS SECURITY INTELLIGENCE instance
When permanently retiring an OPENVAS SECURITY INTELLIGENCE instance, all appliances that are paired with the instance should be unpaired while the instance is still functional (see Chapter 7.3.5).
This ensures that all appliances are in a clean state, ready to be paired with a new instance.
- Disconnecting without access to the OPENVAS SECURITY INTELLIGENCE instance
If an appliance should be disconnected but there is no access to the OPENVAS SECURITY INTELLIGENCE instance, set the remote management in the GOS administration menu of the appliance to
disabled.More information can be found here in the OPENVAS SCAN user manual.
7.2 Viewing Appliances
7.2.1 Viewing the Overvall List of Appliances
All existing appliances can be displayed by selecting Scan Unit Management in the menu.
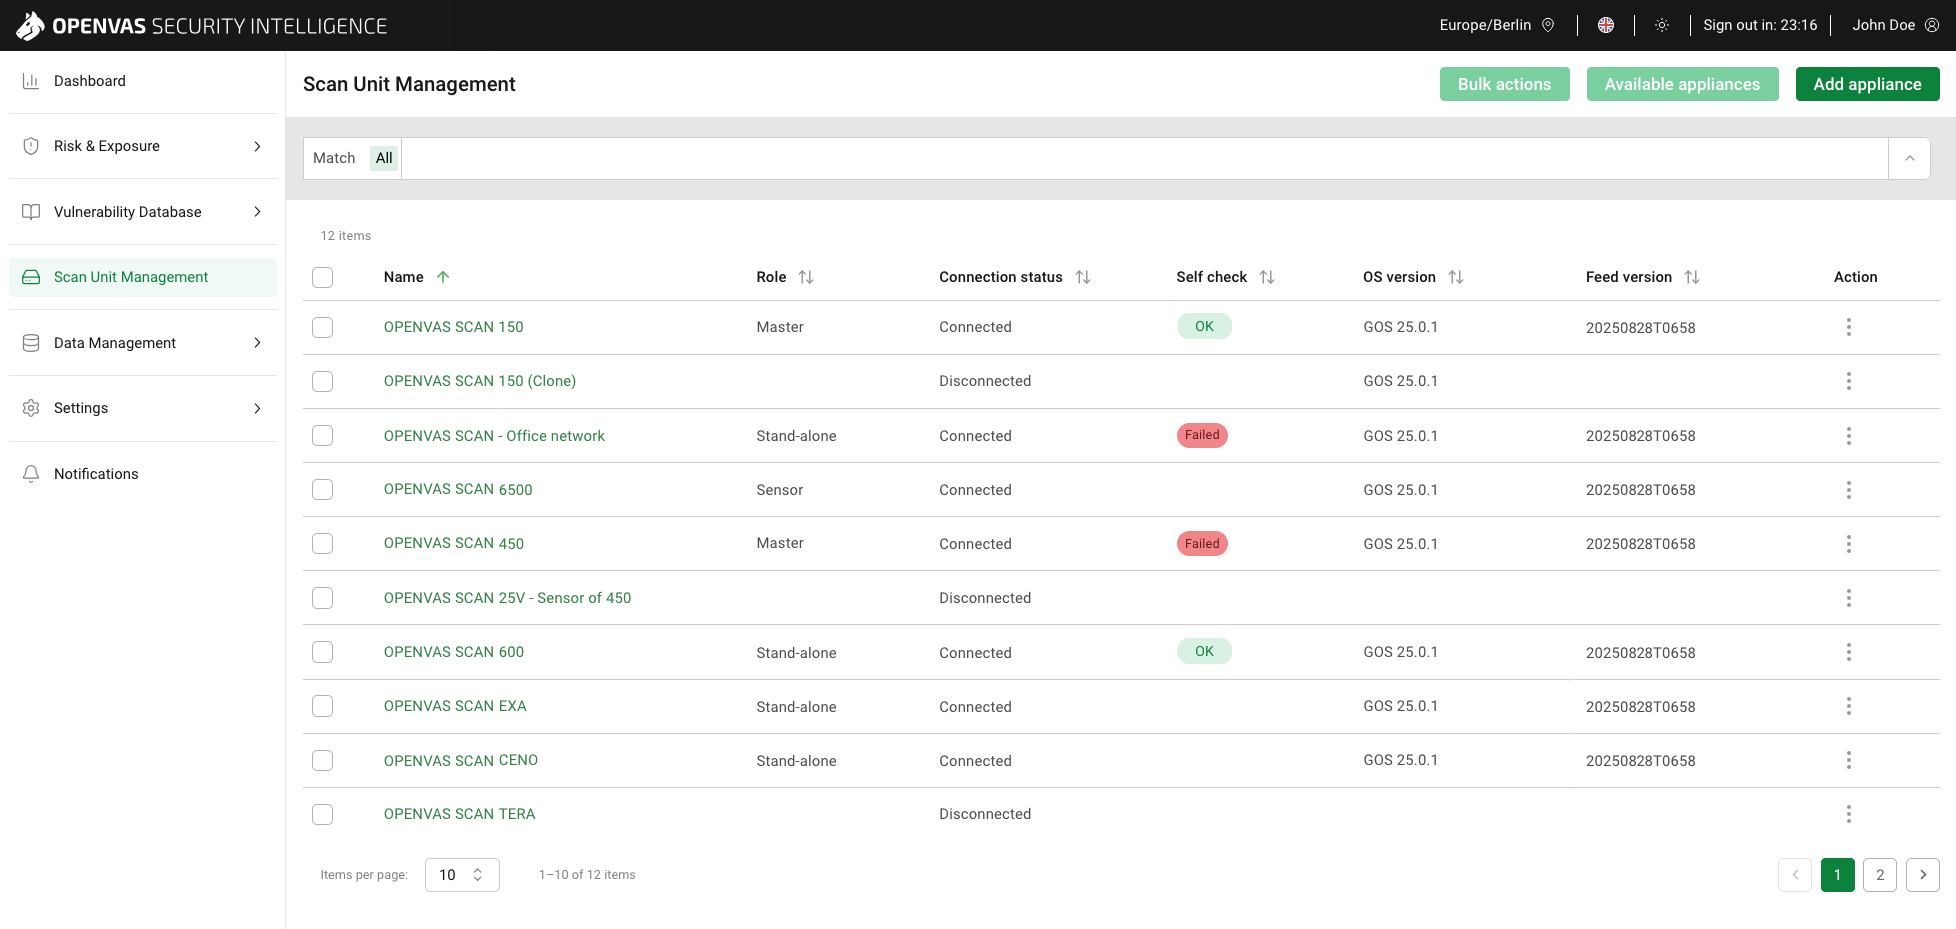
Fig. 7.5 Scan Unit Management page
Tip
In the Column options drop-down menu, the columns to be displayed in the table can be selected.
The columns can be rearranged using drag and drop.
For all appliances, the following information is displayed:
- Name
Name that was specified for the appliance when it was connected (see Chapter 7.1).
Clicking on the appliance name opens the details page of the appliance (see Chapter 7.2.2).
- Role
Role of the appliance that is automatically retrieved based on the appliance’s master-sensor configuration:
Stand-alone: neither sensors nor masters are listed in the configuration.
Master: at least one sensor is listed in the configuration.
Sensor: a master is listed in the configuration.
- Connection status
Connected: an active connection between the appliance and OPENVAS SECURITY INTELLIGENCE exists and data can be exchanged.
Disconnected: no active connection between the appliance and OPENVAS SECURITY INTELLIGENCE exists and no data can be exchanged.
- Self check
Results of the last self-check (see Chapter 7.3.7).
 The self-check did not detect any problems.
 The self-check has detected problems.
No badge is displayed if there was no self-check yet.
Clicking on the appliance name or on the badge opens the details page of the appliance (see Chapter 7.2.2). The detailed self-check results are displayed in a table below the appliance details.
- OS version
Greenbone OS (GOS) version that is currently installed on the appliance.
 is displayed next to the GOS version if a reboot of the appliance is required after a GOS upgrade.
- Feed version
Date and time the feed was last synchronized on the appliance. The format is
<YYYYMMDD>T<HHMM>.
7.2.2 Viewing Appliance Details
In the overall list of appliances (see Chapter 7.2.1), click on the name of an appliance to display the appliance details.
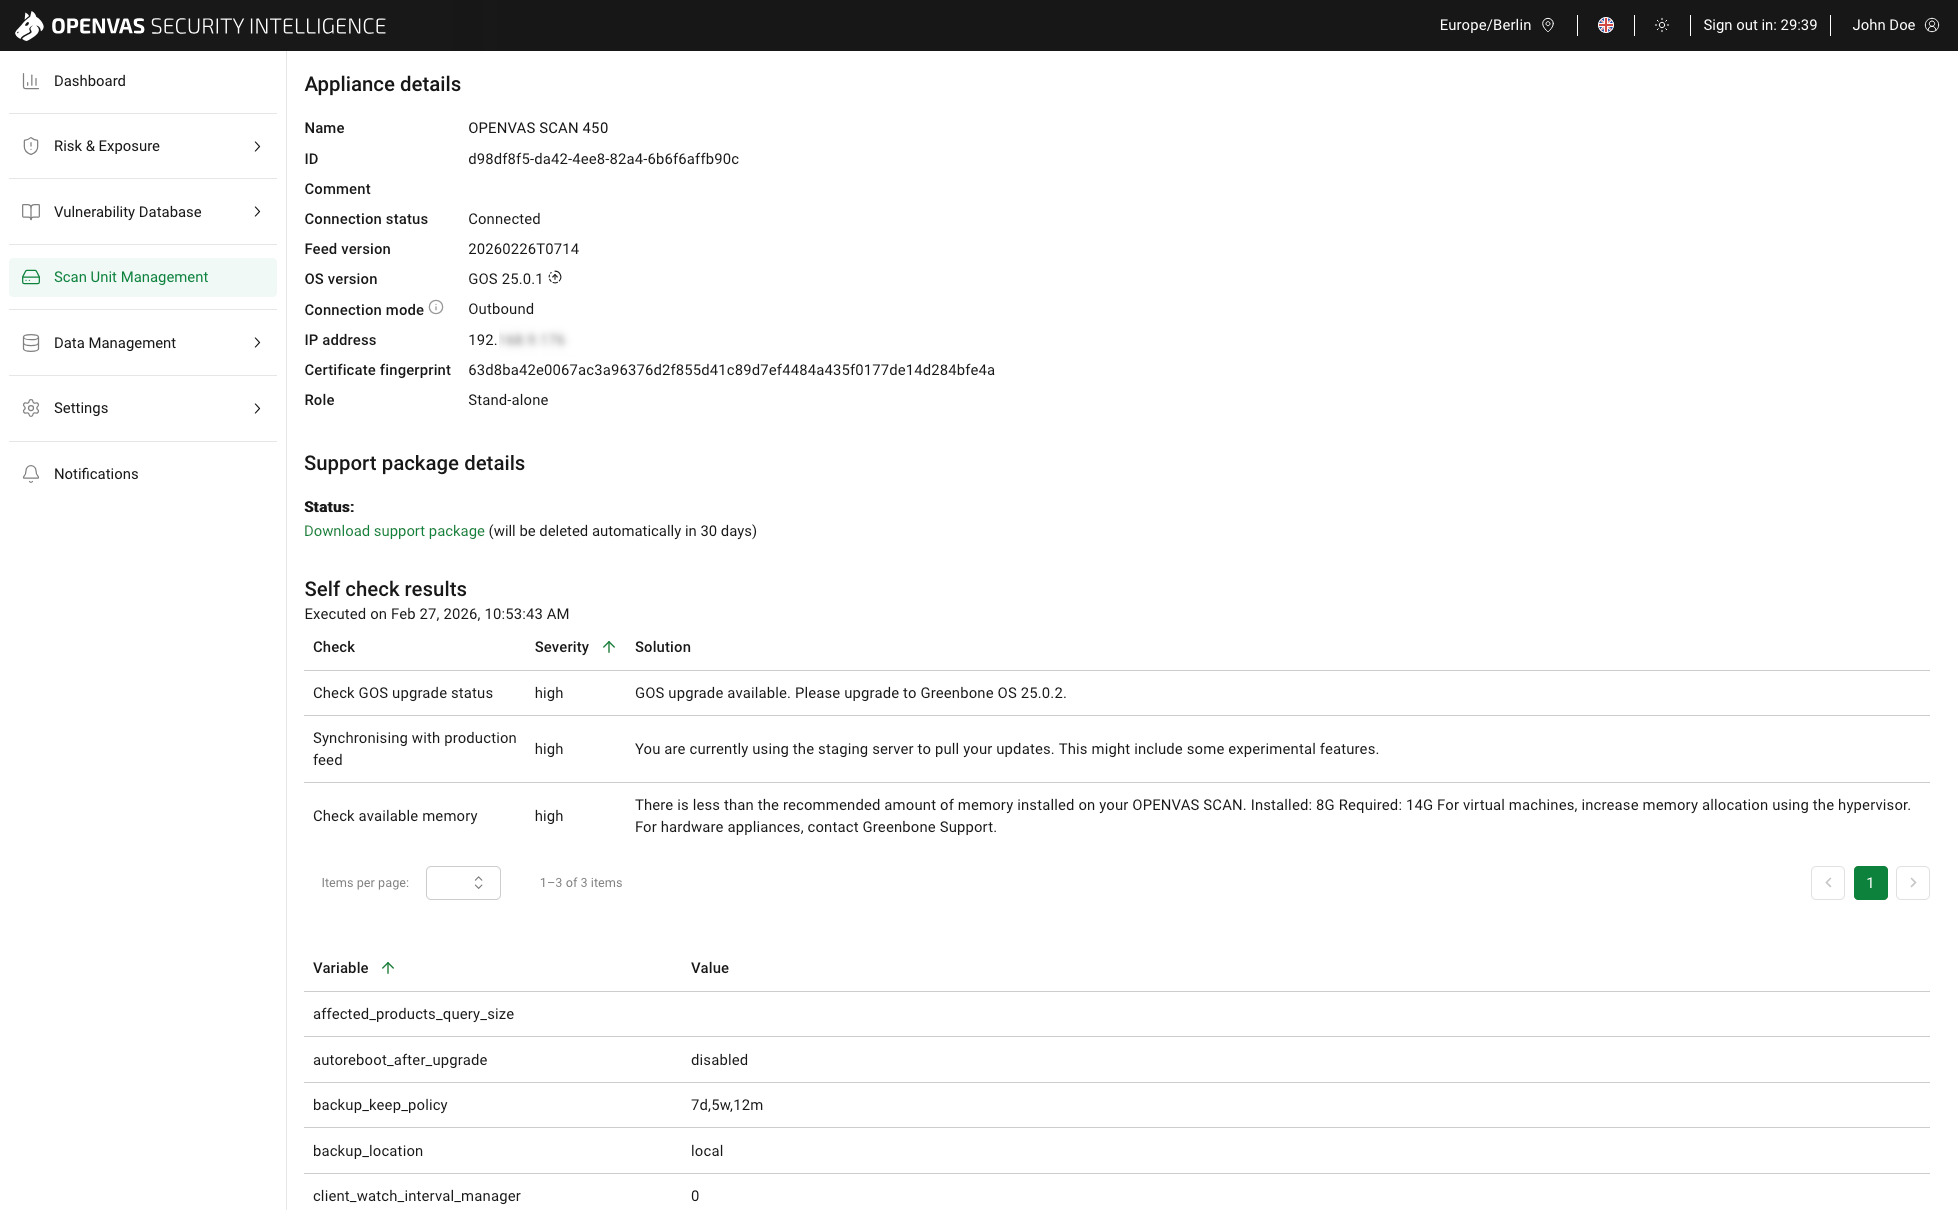
Fig. 7.6 Details of an appliance
The following information is displayed:
- Name
Name that was specified for the appliance when it was connected (see Chapter 7.1).
- ID
Unique, internal ID that was assigned to the appliance when it was connected. The ID always remains the same, even if the name of the appliance is changed.
- Comment
Further information about the appliance that was specified when it was connected (see Chapter 7.1).
- Connection status
Connected: an active connection between the appliance and OPENVAS SECURITY INTELLIGENCE exists and data can be exchanged.
Disconnected: no active connection between the appliance and OPENVAS SECURITY INTELLIGENCE exists and no data can be exchanged.
- Feed version
Date and time the feed was last synchronized on the appliance. The format is
<YYYYMMDD>T<HHMM>.- OS version
Greenbone OS (GOS) version that is currently installed on the appliance.
is displayed next to the GOS version if a reboot of the appliance is required after a GOS upgrade.- Connection mode
There are two connection modes:
- Inbound
The connection is initiated by OPENVAS SECURITY INTELLIGENCE.
The connection is established by providing the URL and the HTTPS fingerprint of the appliance in OPENVAS SECURITY INTELLIGENCE. This method is used for appliances that are located in networks that allow inbound communication.
- Outbound
The connection is initiated by the appliance.
The connection is established by storing the URL of OPENVAS SECURITY INTELLIGENCE on the appliance and then retrieving the appliances available for connection in OPENVAS SECURITY INTELLIGENCE. This method is used for appliances that are located in networks that only allow outbound communication.
- Host/IP address
Host name (for inbound appliances) or IP address (for outbound appliances) of the appliance.
- Certificate fingerprint
SHA256 fingerprint of the appliance’s HTTPS certificate.
- Role
Role of the appliance that is automatically retrieved based on the appliance’s master-sensor configuration:
Stand-alone: neither sensors nor masters are listed in the configuration.
Master: at least one sensor is listed in the configuration.
Sensor: a master is listed in the configuration.
- Support package details
Status of the support package creation (see Chapters 7.3.12 and 7.4.7).
- Self check results
Results of the last self-check (see Chapters 7.3.7 and 7.4.8).
- Variables
Settings and configurations of the appliance’s operating system.
Some of the configurations are set manually via the GOS administration menu, others are non-changeable configurations of the appliance. More information about specific configurations can be found here in the OPENVAS SCAN user manual.
Note
Variables that contain passwords, credentials, or private keys are not displayed. For those variables, the entry is empty.
If a variable containing a key (also) contains the fingerprint of the key, the fingerprint is displayed for this variable.
7.3 Managing a Single Appliance
7.3.1 Editing an Appliance
An appliance can be edited as follows:
Select Scan Unit Management in the menu.
Click
 in the column Action and select Configuration > Edit from the drop-down list.
Update the required data (see Chapter 7.1).
Note
For appliances connected via outbound mode (see Chapter 7.1), the URL and the certificate fingerprint cannot be edited.
Click Save.
→ The appliance’s data in OPENVAS SECURITY INTELLIGENCE is updated.
7.3.2 Cloning an Appliance
By cloning an appliance, a copy of the appliance’s data is created in OPENVAS SECURITY INTELLIGENCE.
The appliance’s name is changed by getting the suffix (Clone).
This functionality can be used when several appliances that mostly have identical data must be added to OPENVAS SECURITY INTELLIGENCE. The cloned appliances can then be edited and only the relevant data needs to be changed. In this way, the appliances do not have to be created from scratch.
Note
Only appliances connected via inbound mode (see Chapter 7.1) can be cloned.
An appliance can be cloned as follows:
Select Scan Unit Management in the menu.
Click
in the column Action and select Configuration > Clone from the drop-down list.→ The clone is added to the table.
The connection status is Disconnected.
Note
Before the new appliance can be paired, its URL and HTTPS fingerprint must be changed first (see Chapter 7.3.1).
7.3.3 Deleting an Appliance
Note
If a master appliance of a master-sensor setup is deleted from OPENVAS SECURITY INTELLIGENCE, it is not longer possible to upgrade the connected sensors to the latest GOS version in OPENVAS SECURITY INTELLIGENCE.
An appliance can be deleted as follows:
Select Scan Unit Management in the menu.
Click
in the column Action and select Configuration > Delete from the drop-down list.→ A warning dialog is displayed asking to confirm the deletion.
Note
Deleting an appliance is irreversible. The appliance and all associated data is removed permanently.
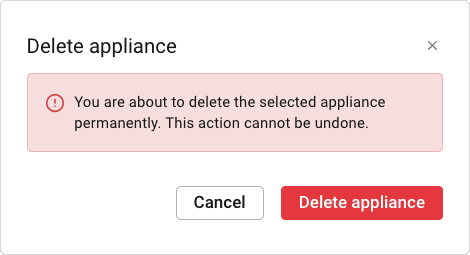
Fig. 7.7 Deleting an appliance
Click Delete appliance.
→ The appliance is deleted from OPENVAS SECURITY INTELLIGENCE.
7.3.4 Pairing an Appliance
Note
Pairing an appliance is only possible if the appliance is currently unpaired.
An appliance can be paired as follows:
Select Scan Unit Management in the menu.
Click
in the column Action and select Access > Pair from the drop-down list.
7.3.5 Unpairing an Appliance
Note
Unpairing an appliance is only possible if the appliance is currently paired.
An appliance can be unpaired as follows:
Select Scan Unit Management in the menu.
Click
in the column Action and select Access > Unpair from the drop-down list.→ The connection status changes to Disconnected.
7.3.6 Configuring SSH on an Appliance
SSH allows secure and remote access to the appliance’s GOS administration menu and command line over an unsecured network. Additionally, it is required for the master-sensor communication.
An SSH client is required to connect to the appliance.
When connecting to the appliance with an SSH client, the following key exchange methods are supported:
ecdh-sha2-nistp256
ecdh-sha2-nistp384
ecdh-sha2-nistp521
curve25519-sha256
curve25519-sha256@libssh.org
7.3.6.1 Enabling or Disabling SSH
The SSH server embedded in the appliance can be enabled or disabled as follows:
Select Scan Unit Management in the menu.
Click
in the column Action and select Access > Enable SSH or Access > Disable SSH from the drop-down list.→ SSH is enabled or disabled on the appliance.
7.3.6.2 Copying the SSH Access Command
For easy SSH access to the GOS administration menu of an appliance, the command can be copied to the clipboard as follows:
Select Scan Unit Management in the menu.
Click
in the column Action and select Access > GOS menu from the drop-down list.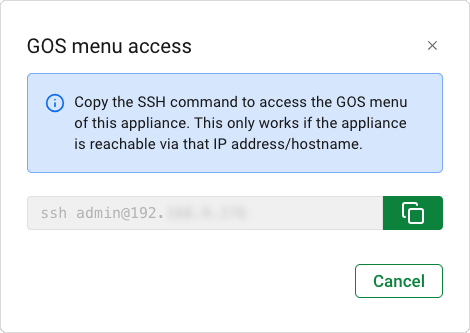
Fig. 7.8 Copying the SSH access command
Click
 .
.→ The SSH command is copied to the clipboard and can be pasted in any command line to access the GOS administration menu of the appliance.
7.3.7 Running a Self-Check on an Appliance
The self-check checks the appliance setup. It displays wrong or missing configuration details that could prevent the appliance from functioning correctly. The following items are checked:
Network connection
DNS resolution
Feed reachability
Available updates
User configuration
A self-check can be run on an appliance as follows:
Select Scan Unit Management in the menu.
Click
in the column Action and select Maintenance > Self check from the drop-down list.→ The self-check is running.
Once the self-check is finished, the result is displayed in the Self check column. When the cursor is moved over the badge, the date and time of the last self-check is displayed.
Click on the appliance name or on the badge to open the details page of the appliance.
→ The self-check results are displayed in the table Self check results.
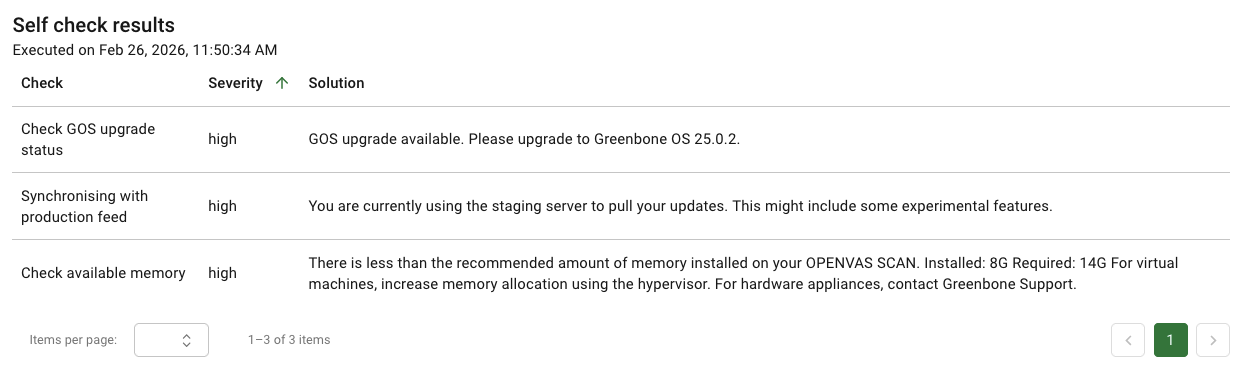
Fig. 7.9 Self-check results
7.3.8 Upgrading GOS on an Appliance
Note
In order to perform a GOS upgrade, a valid subscription key must be stored on the appliance. More information can be found here in the OPENVAS SCAN user manual.
It is recommended to create a backup before performing the upgrade.
A GOS upgrade cannot be initiated directly for sensor appliances. However, a successful GOS upgrade on a master will also start a GOS upgrade on all sensors connected with the master.
A GOS upgrade can be performed on an appliance as follows:
Select Scan Unit Management in the menu.
Click
in the column Action and select Maintenance > Upgrade from the drop-down list.→ A warning dialog is displayed asking to confirm the upgrade.
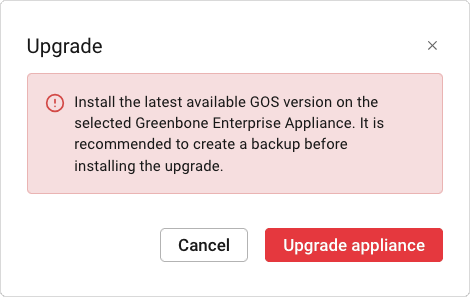
Fig. 7.10 Upgrading GOS on an appliance
Click Upgrade appliance.
→ The upgrade may take some time. When the upgrade is finished, the entry in the OS version column is updated automatically.
Note
For master-sensor setups, the GOS upgrade is started automatically on all sensors connected with the master after the GOS upgrade on the master is completed.
Occasionally, a reboot of the appliance is required after the GOS upgrade. In this case, the OS version column displays
with a corresponding tooltip next to the GOS version.
7.3.9 Updating the Feed on an Appliance
Note
Unless disabled, an automatic feed update is also performed daily at the configured maintenance time. More information can be found here in the the OPENVAS SCAN user manual.
A feed update cannot be initiated directly for sensor appliances. However, a successful feed update on a master will also start a feed update on all sensors connected with the master.
A feed update can be performed on an appliance as follows:
Select Scan Unit Management in the menu.
Click
in the column Action and select Maintenance > Feed update from the drop-down list.→ A warning dialog is displayed asking to confirm the feed update.
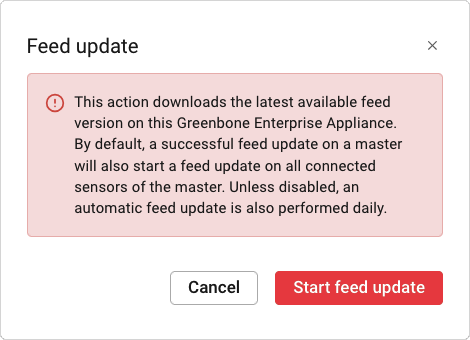
Fig. 7.11 Updating the feed on an appliance
Click Start feed update.
→ The feed update may take some time. When the feed update is finished, the entry in the Feed version column is updated automatically.
Note
For master-sensor setups, the feed update is started automatically on all sensors connected with the master after the feed update on the master is completed.
7.3.10 Shutting Down an Appliance
Note
Shutting down an appliance is only possible if no system operation is currently running on it.
An appliance can be shut down as follows:
Select Scan Unit Management in the menu.
Click
in the column Action and select Maintenance > Shut down from the drop-down list.→ A warning dialog is displayed asking to confirm the shutdown.
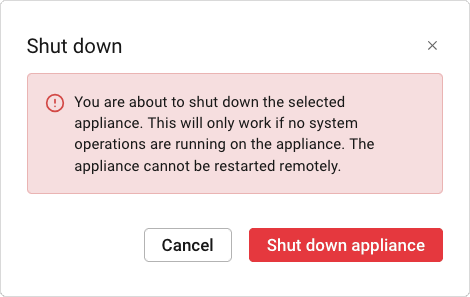
Fig. 7.12 Shutting down an appliance
Click Shut down appliance.
7.3.11 Rebooting an Appliance
Note
Rebooting an appliance is only possible if no system operation is currently running on it.
An appliance can be rebooted as follows:
Select Scan Unit Management in the menu.
Click
in the column Action and select Maintenance > Reboot from the drop-down list.→ A warning dialog is displayed asking to confirm the reboot.
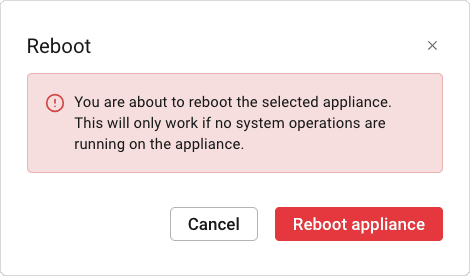
Fig. 7.13 Rebooting an appliance
Click Reboot appliance.
7.3.12 Using a Support Package on an Appliance
Sometimes the Greenbone Support Team needs additional information to troubleshoot and support users. The required data is collected in the form of an (encrypted) support package that contains all configuration data of the appliance.
The support package can be encrypted using the Greenbone Support Team GPG public key.
Note
Only the Greenbone Support Team is able to decrypt an encrypted support package.
Note
Support packages are automatically deleted from an appliance after 30 days. However, they can also be deleted manually (see Chapter 7.3.12.3).
7.3.12.1 Creating a Support Package on an Appliance
A support package can be created on an appliance as follows:
Select Scan Unit Management in the menu.
Click
in the column Action and select Support package > Create from the drop-down list.→ A dialog with the option to encrypt the support package is displayed.
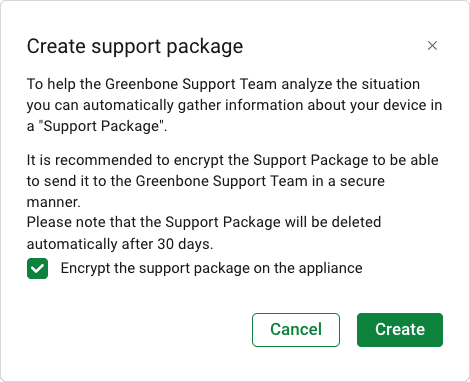
Fig. 7.14 Creating a support package
If the support package should be encrypted, activate the checkbox.
Click Create.
→ The support package is created.
Click on the appliance name to open the details page of the appliance.
→ The status of the support package creation is displayed under Support package details.
Note
The page is not updated automatically when the creation process is finished.
7.3.12.2 Downloading a Support Package from an Appliance
A previously created support package can be downloaded from an appliance as follows:
Select Scan Unit Management in the menu.
Click
in the column Action and select Support package > Download from the drop-down list.Note
When the support package is still being created, the option is grayed out.
→ The support package is downloaded as a ZIP file.
Send the ZIP file to the Greenbone Support Team.
or
Select Scan Unit Management in the menu.
Click on the appliance name to open the details page of the appliance.
→ A link to download the support package is displayed under Support package details.
Note
If the support package is still being created, this is displayed accordingly.
Click Download support package.
→ The support package is downloaded as a ZIP file.
Send the ZIP file to the Greenbone Support Team.
7.3.12.3 Deleting a Support Package from an Appliance
A support package can be deleted from an appliance as follows:
Select Scan Unit Management in the menu.
Click
in the column Action and select Support package > Delete from the drop-down list.→ The support package is deleted immediately.
Note
Deleting a support package is irreversible.
7.4 Managing Multiple Appliances
Some actions can be carried out directly on several appliances at the same time via so-called bulk actions.
7.4.1 Cloning Multiple Appliances
By cloning appliances, a copy of each of the appliance’s data is created in OPENVAS SECURITY INTELLIGENCE.
The appliance’s name is changed by getting the suffix (Clone).
This functionality can be used when several appliances that mostly have identical data must be added to OPENVAS SECURITY INTELLIGENCE. The cloned appliances can then be edited and only the relevant data needs to be changed. In this way, the appliances do not have to be created from scratch.
Note
Only appliances connected via inbound mode (see Chapter 7.1) can be cloned.
Multiple appliances can be cloned as follows:
Select Scan Unit Management in the menu.
Activate the checkboxes of all appliances that should be processed at the same time.
Click Bulk actions.
Select Clone from the drop-down list.
Click Apply.
Note
If there are any appliances with the outbound mode among the selected ones, the cloning is not carried out and an error message is displayed.
Deactivate the checkboxes of the appliances with outbound mode and repeat the action.
→ The clones are added to the table.
The connection status is Disconnected.
Note
Before the new appliances can be paired, their URL and HTTPS fingerprint must be changed first (see Chapter 7.3.1).
7.4.2 Deleting Multiple Appliances
Note
If a master appliance of a master-sensor setup is deleted from OPENVAS SECURITY INTELLIGENCE, it is not longer possible to upgrade the connected sensors to the latest GOS version in OPENVAS SECURITY INTELLIGENCE.
Multiple appliances can be deleted as follows:
Select Scan Unit Management in the menu.
Activate the checkboxes of all appliances that should be processed at the same time.
Click Bulk actions.
Select Delete from the drop-down list.
Click Apply.
→ A warning dialog is displayed asking to confirm the deletion.
Note
Deleting appliances is irreversible. The appliances and all associated data is removed permanently.
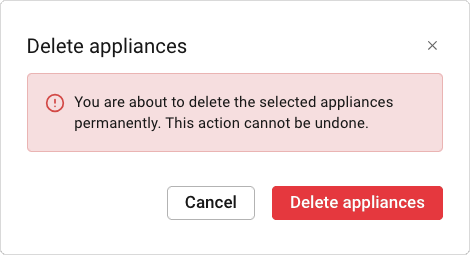
Fig. 7.15 Deleting multiple appliances
Click Delete appliances.
→ The appliances are deleted from OPENVAS SECURITY INTELLIGENCE.
7.4.3 Rebooting Multiple Appliances
Note
Rebooting an appliance is only possible if no system operation is currently running on it.
Multiple appliances can be rebooted as follows:
Select Scan Unit Management in the menu.
Activate the checkboxes of all appliances that should be processed at the same time.
Click Bulk actions.
Select Reboot from the drop-down list.
Click Apply.
→ A warning dialog is displayed asking to confirm the reboot.
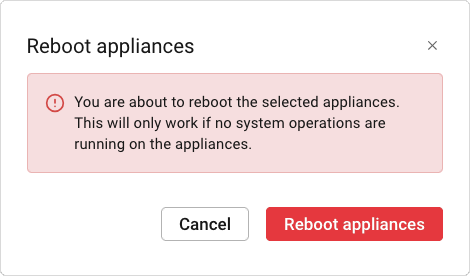
Fig. 7.16 Rebooting multiple appliances
Click Reboot appliances.
7.4.4 Shutting Down Multiple Appliances
Note
Shutting down an appliance is only possible if no system operation is currently running on it.
Multiple appliances can be shut down as follows:
Select Scan Unit Management in the menu.
Activate the checkboxes of all appliances that should be processed at the same time.
Click Bulk actions.
Select Shutdown from the drop-down list.
Click Apply.
→ A warning dialog is displayed asking to confirm the shutdown.
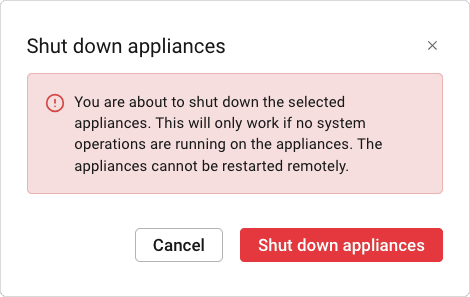
Fig. 7.17 Shutting down multiple appliances
Click Shut down appliances.
7.4.5 Upgrading GOS on Multiple Appliances
Note
In order to perform a GOS upgrade, a valid subscription key must be stored on the appliance. More information can be found here in the OPENVAS SCAN user manual.
It is recommended to create a backup before performing the upgrade.
A GOS upgrade cannot be initiated directly for sensor appliances. However, a successful GOS upgrade on a master will also start a GOS upgrade on all sensors connected with the master.
A GOS upgrade can be performed on multiple appliances as follows:
Select Scan Unit Management in the menu.
Activate the checkboxes of all appliances that should be processed at the same time.
Click Bulk actions.
Select Upgrade from the drop-down list.
Click Apply.
→ A warning dialog is displayed asking to confirm the upgrade.
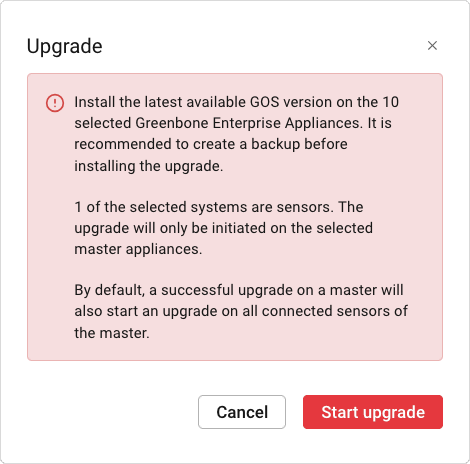
Fig. 7.18 Upgrading GOS on multiple appliances
Click Start upgrade.
→ The upgrade may take some time. When the upgrade is finished, the entry in the OS version column is updated automatically.
Note
For master-sensor setups, the GOS upgrade is started automatically on all sensors connected with the master after the GOS upgrade on the master is completed.
Occasionally, a reboot of the appliance is required after the GOS upgrade. In this case, the OS version column displays
with a corresponding tooltip next to the GOS version.
7.4.6 Updating the Feed on Multiple Appliances
Note
Unless disabled, an automatic feed update is also performed daily at the configured maintenance time. More information can be found here in the the OPENVAS SCAN user manual.
A feed update cannot be initiated directly for sensor appliances. However, a successful feed update on a master will also start a feed update on all sensors connected with the master.
A feed update can be performed on multiple appliances as follows:
Select Scan Unit Management in the menu.
Activate the checkboxes of all appliances that should be processed at the same time.
Click Bulk actions.
Select Feed update from the drop-down list.
Click Apply.
→ A warning dialog is displayed asking to confirm the feed update.
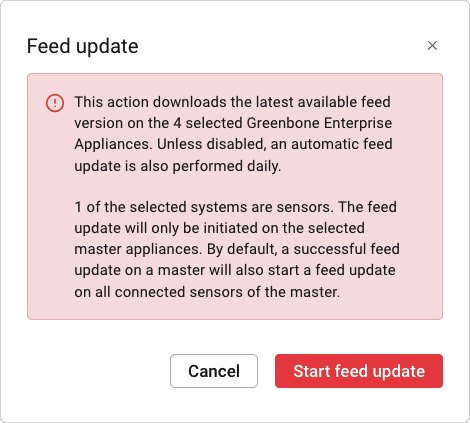
Fig. 7.19 Updating the feed on multiple appliances
Click Start feed update.
→ The feed update may take some time. When the feed update is finished, the entry in the Feed version column is updated automatically.
Note
For master-sensor setups, the feed update is started automatically on all sensors connected with the master after the feed update on the master is completed.
7.4.7 Using Support Packages on Multiple Appliances
Sometimes the Greenbone Support Team needs additional information to troubleshoot and support users. The required data is collected in the form of an (encrypted) support package that contains all configuration data of the appliance.
The support package can be encrypted using the Greenbone Support Team GPG public key.
Note
Only the Greenbone Support Team is able to decrypt an encrypted support package.
Note
Support packages are automatically deleted from an appliance after 30 days. However, they can also be deleted manually (see Chapter 7.4.7.3).
7.4.7.1 Creating Support Packages on Multiple Appliances
Support packages can be created on multiple appliances as follows:
Select Scan Unit Management in the menu.
Activate the checkboxes of all appliances that should be processed at the same time.
Click Bulk actions.
Select Create support package from the drop-down list.
Click Apply.
→ A dialog with the option to encrypt the support packages is displayed.
Fig. 7.20 Creating support packages on multiple appliances
If the support packages should be encrypted, activate the checkbox.
Click Create.
→ The support packages are created.
Click on an appliance name to open the details page of the appliance.
→ The status of the support package creation is displayed under Support package details.
Note
The page is not updated automatically when the creation process is finished.
7.4.7.2 Downloading Support Packages from Multiple Appliances
Note
Currently, support packages can only be downloaded from one appliance at a time.
The instructions can be found in Chapter 7.3.12.2.
7.4.7.3 Deleting Support Packages from Multiple Appliances
Support packages can be deleted from multiple appliances as follows:
Select Scan Unit Management in the menu.
Activate the checkboxes of all appliances that should be processed at the same time.
Click Bulk actions.
Select Delete support package from the drop-down list.
Click Apply.
→ A warning dialog is displayed asking to confirm the deletion.
Note
Deleting a support package is irreversible.
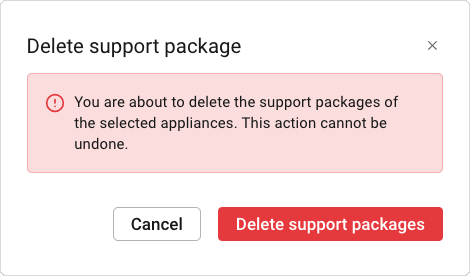
Fig. 7.21 Deleting support packages from multiple appliances
Click Delete support packages.
→ The support packages are deleted from the appliances.
7.4.8 Running a Self-Check on Multiple Appliances
The self-check checks the appliance setup. It displays wrong or missing configuration details that could prevent the appliance from functioning correctly. The following items are checked:
Network connection
DNS resolution
Feed reachability
Available updates
User configuration
A self-check can be run on multiple appliances as follows:
Select Scan Unit Management in the menu.
Activate the checkboxes of all appliances that should be processed at the same time.
Click Bulk actions.
Select Self check from the drop-down list.
Click Apply.
→ The self-check is running.
Once the self-check is finished, the result is displayed in the Self check column. When the cursor is moved over the badge, the date and time of the last self-check is displayed.
Click on the appliance name or on the badge to open the details page of the appliance.
→ The self-check results are displayed in the table Self check results.
Fig. 7.22 Self-check results