4 Managing Users
Note
The user management is only available for super admins.
4.1 Roles
OPENVAS SECURITY INTELLIGENCE uses a role-based access concept.
- Super admin
This role has full access to OPENVAS SECURITY INTELLIGENCE and the entire Keycloak installation.
The initial user
openvasis assigned this role.This role should only be used for the initial setup and the user management.
- Operator
This role has full access to OPENVAS SECURITY INTELLIGENCE.
This role does not have access to the user management.
- User
This role has full read access to all data in its access scope.
This role does not have access to the user management and to application-wide settings.
4.2 Users
4.2.1 Viewing Users
All users can be displayed by selecting Settings > User Management in the menu.
For all users, the following information is displayed:
- Username
Name that is used for signing in to OPENVAS SECURITY INTELLIGENCE.
Clicking on the name opens the details page of the user, where the user can be edited (see Chapter 4.2.3) and the password can be reset (see Chapter 4.2.5).
E-mail address of the user.
- Last name
Last name of the user.
- First name
First name of the user.
When clicking  the following action is available:
Delete the user (see Chapter 4.2.4).
4.2.2 Adding a User
A user can be added as follows:
Select Settings > User Management in the menu.
→ The user management is opened in a new browser tab.
Click Add user.
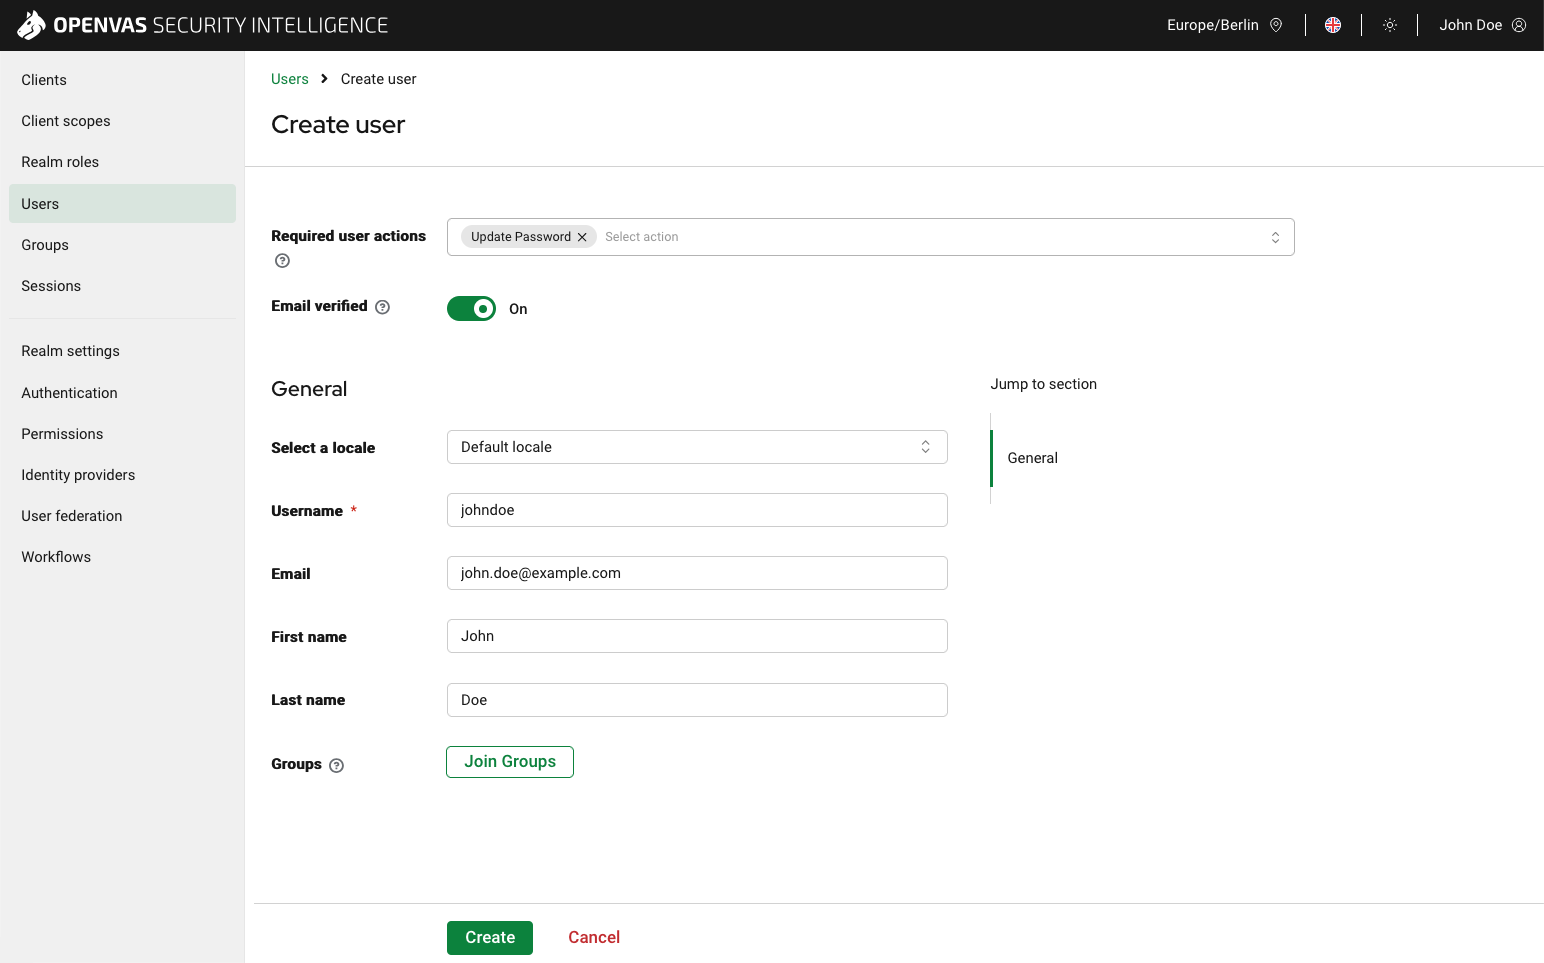
Fig. 4.1 Adding a user
Fill in the input boxes:
- Required user actions
Actions that the user must perform upon initial login, such as changing their password or updating their user profile.
- Select a locale
User’s default language of OPENVAS SECURITY INTELLIGENCE.
- Username
Name that is used for signing in to OPENVAS SECURITY INTELLIGENCE.
The user name must be between three and 255 characters long. Only the following characters are allowed for the user name:
All lowercase English letters
Numbers 0–9
@ (at sign)
. (full stop)
- (dash)
_ (underscore)
This input box is mandatory.
- E-mail address
E-mail address of the user.
- First name
First name of the user.
- Last name
Last name of the user.
Click Join Groups.
Note
The pre-defined sub-groups within the Platform group are used for role assignment. By adding users to one of the sub-groups, the respective role is assigned.
Click
 for the Platform group.
Activate the checkbox of the desired role.
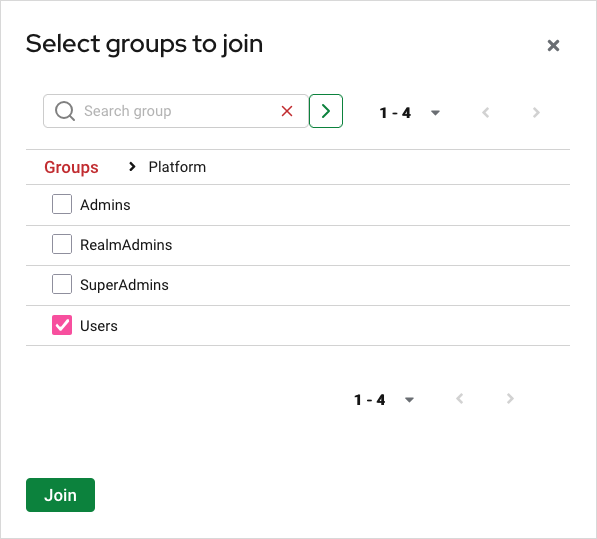
Fig. 4.2 Assigning a role to a user
Click Groups to go back to the group overview.
Note
All other groups are sub-groups of the Custom group (see Chapter 4.3.1).
Click
for the Custom group.Activate the checkboxes for the desired groups.
Click Join.
Click Create.
→ The details page of the user is opened.
Select the Credentials tab.
Click Set password.
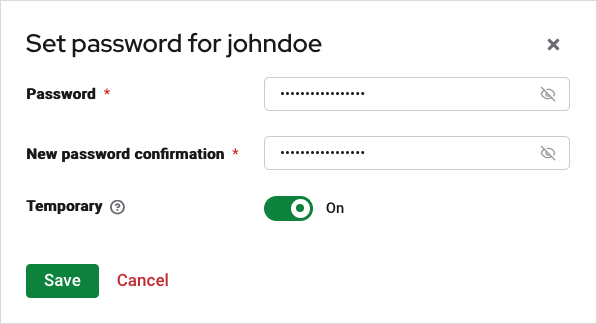
Fig. 4.3 Setting a new password
Enter a password for the new user and confirm it.
Note
The password must fulfill the criteria specified in the password policy (see Chapter 4.4).
If the user should be forced to change the password when logging in for the first time, enable the toggle switch Temporary.
Click Save.
Click Save password to confirm.
→ The user can sign in to OPENVAS SECURITY INTELLIGENCE with the specified user name and password.
Note
If Temporary has been enabled, the user must change the password after signing in.
4.2.3 Editing a User
A user can be edited as follows:
Select Settings > User Management in the menu.
→ The user management is opened in a new browser tab.
Click on the name of the user.
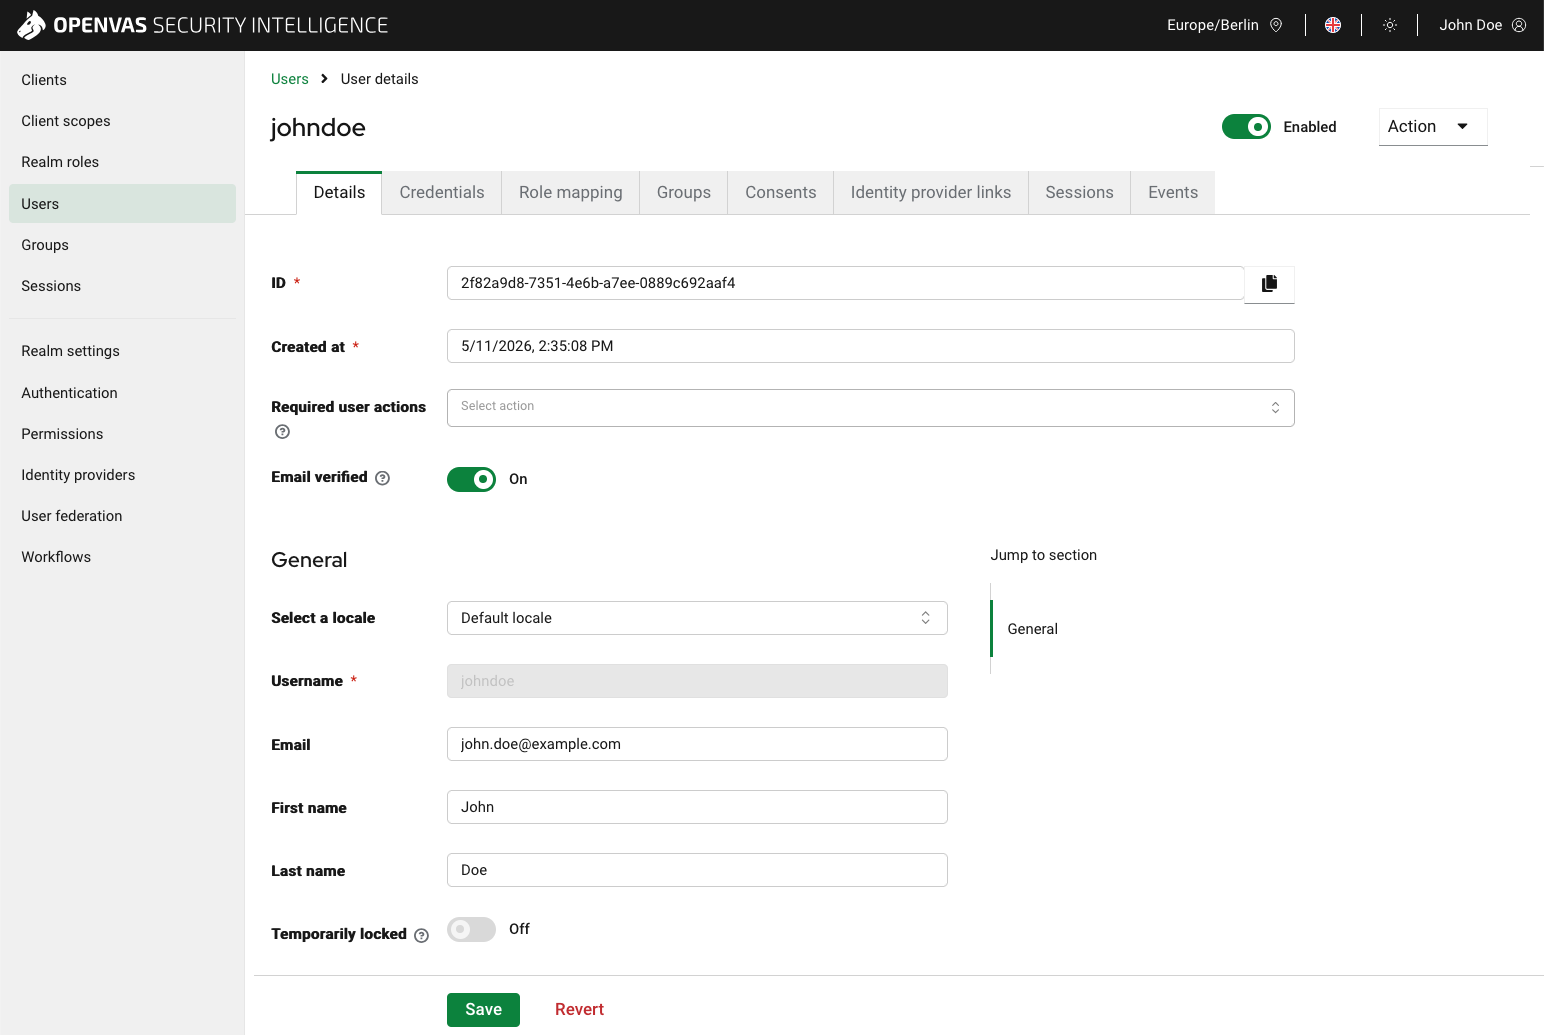
Fig. 4.4 Editing a user
Update the required data.
Click Save.
→ The user’s data in OPENVAS SECURITY INTELLIGENCE is updated.
4.2.4 Deleting a User
A user can be deleted as follows:
Select Settings > User Management in the menu.
→ The user management is opened in a new browser tab.
Click
in the row of the user and select Delete from the drop-down list.Note
To delete multiple users at once, select the checkboxes of the users, click
in the top bar, and select Delete user from the dropdown list.→ A warning dialog is displayed asking to confirm the deletion.
Note
Deleting a user is irreversible. The user and all associated data is removed permanently.
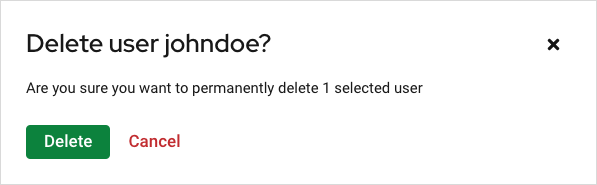
Fig. 4.5 Confirming the deletion
Click Delete.
→ The user is removed from OPENVAS SECURITY INTELLIGENCE.
4.2.5 Resetting the Password of a User
A user’s password can be reset by setting a temporary new password as follows:
A user can be edited as follows:
Select Settings > User Management in the menu.
→ The user management is opened in a new browser tab.
Click on the name of the user.
Select the Credentials tab.
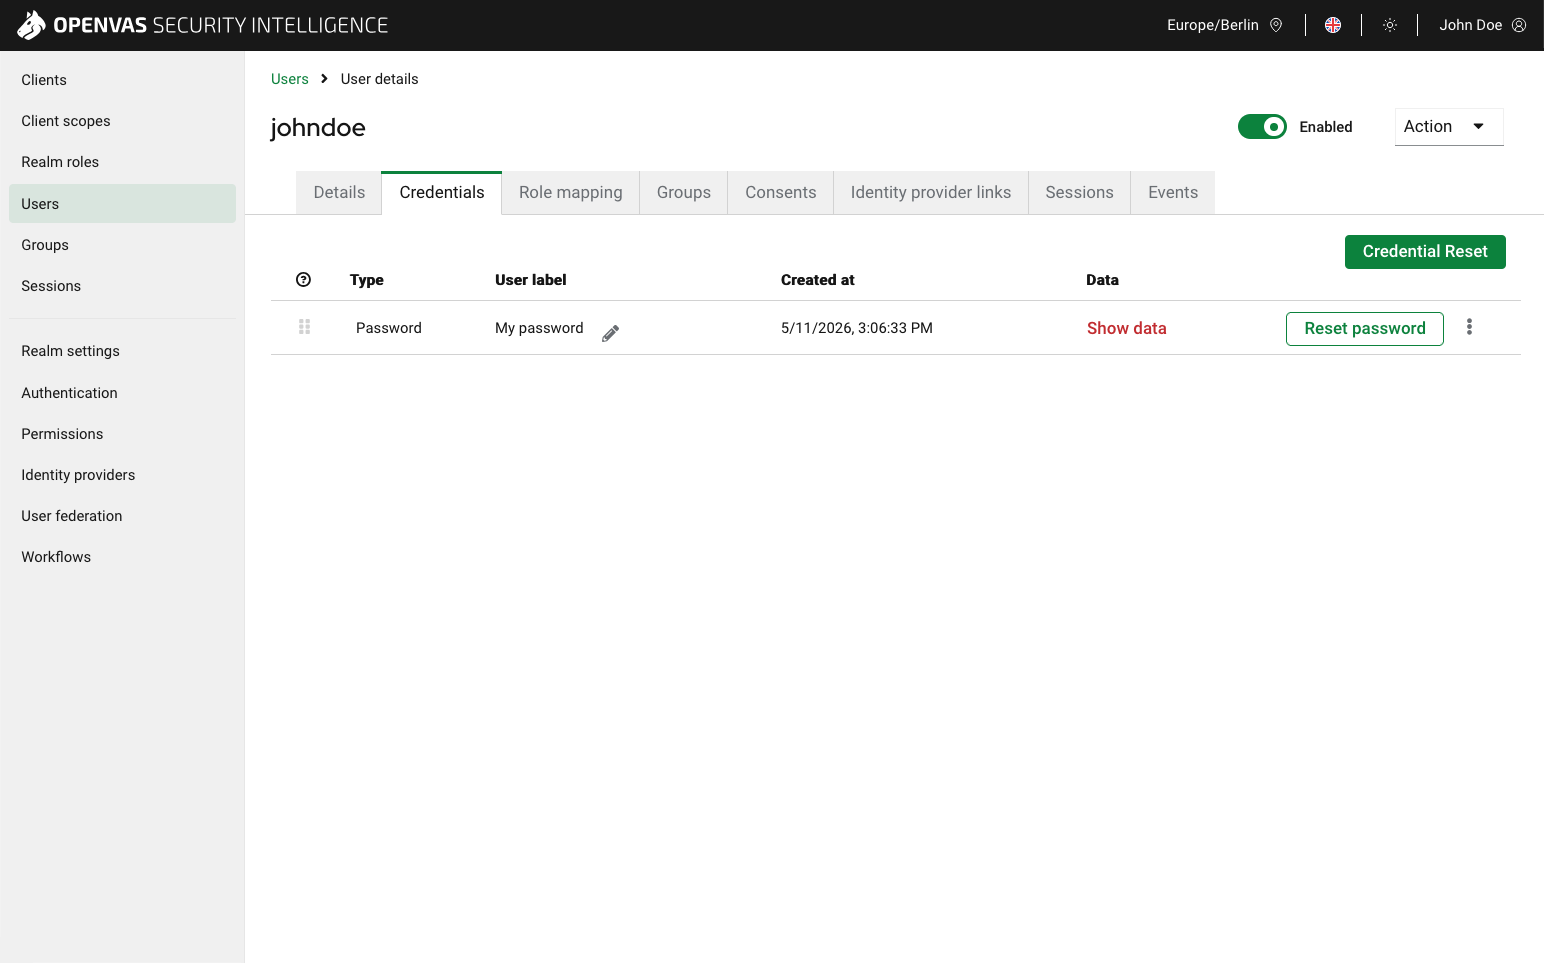
Fig. 4.6 Resetting a password
Click Reset password in the row Password.
Enter a new password in the input box and confirm it.
Note
The password must fulfill the criteria specified in the password policy (see Chapter 4.4).
Fig. 4.7 Setting a new password
If the user should be forced to change the password when logging in for the first time with the new password, enable the toggle switch Temporary.
Click Save.
→ The user can sign in to OPENVAS SECURITY INTELLIGENCE with the new password.
Note
If Temporary has been enabled, the user must change the password after signing in.
4.3 Groups
Groups are used to logically assemble users.
4.3.1 Creating a Group
A group can be created as follows:
Select Settings > User Management in the menu.
→ The user management is opened in a new browser tab.
Select Groups in the menu.
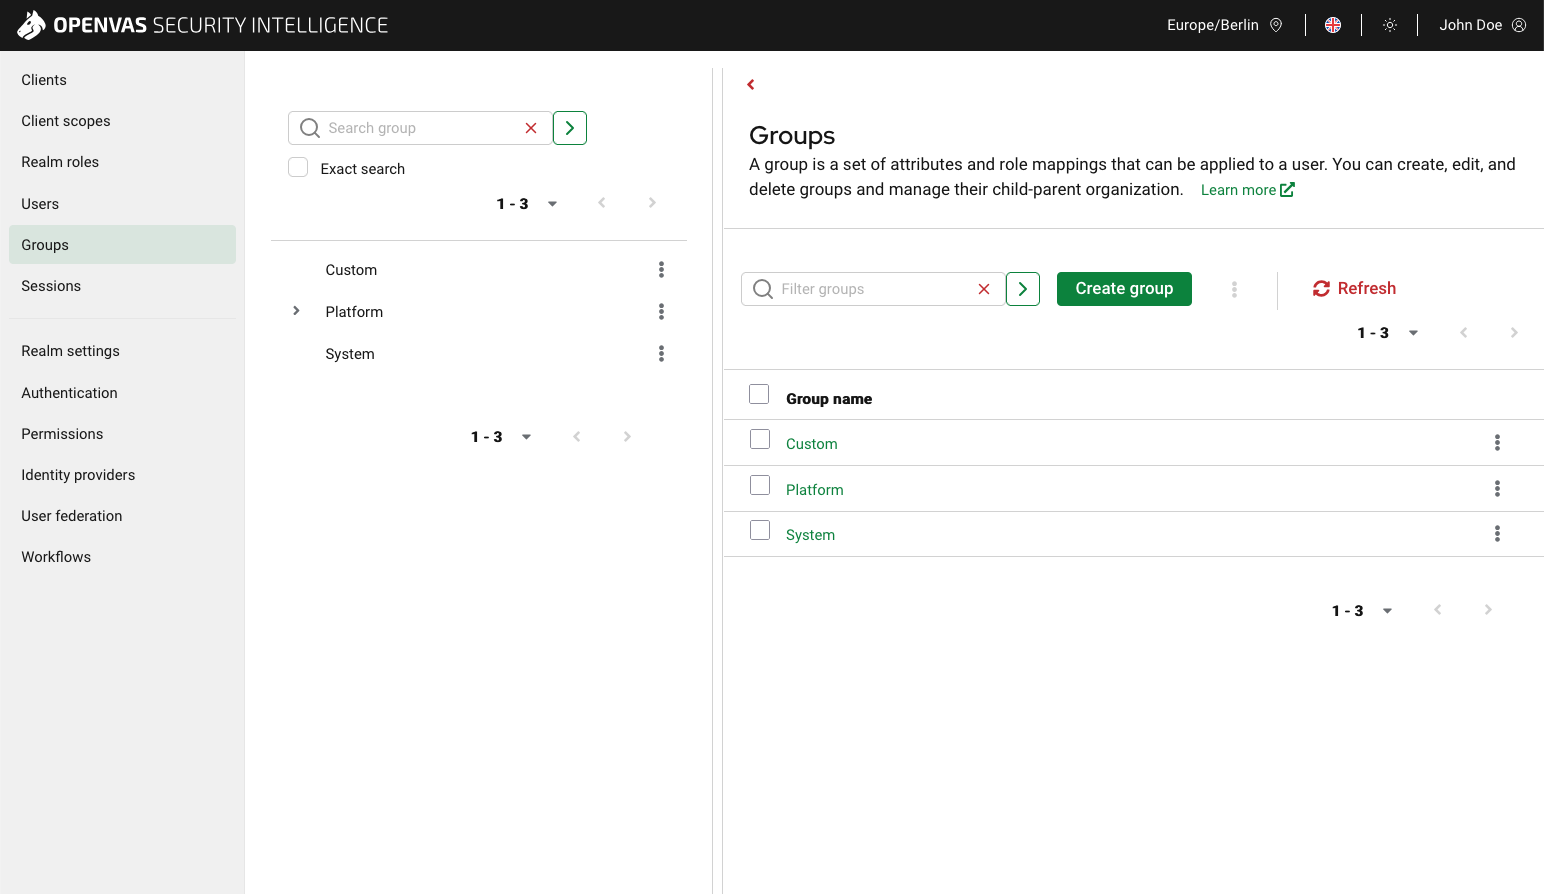
Fig. 4.8 Creating a group
Note
All groups must be sub-groups of the Custom group.
Click on the Custom group.
Click Create group.
Enter a name and a description for the group.
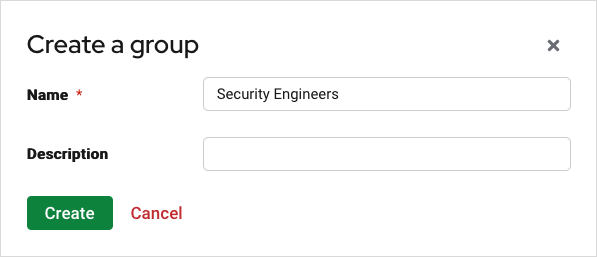
Fig. 4.9 Creating a group
Click Create.
4.3.2 Editing a Group
A group can be edited as follows:
Select Settings > User Management in the menu.
→ The user management is opened in a new browser tab.
Select Groups in the menu.
Click on the Custom group.
Click on the name of the group that should be edited.
4.3.3 Deleting a Group
A group can be deleted as follows:
Select Settings > User Management in the menu.
→ The user management is opened in a new browser tab.
Select Groups in the menu.
Click on the Custom group.
Click
in the row of the group that should be deleted and select Delete from the drop-down list.Note
To delete multiple groups at once, select the checkboxes of the groups, click
in the top bar, and select Delete from the dropdown list.→ A warning dialog is displayed asking to confirm the deletion.
Note
Deleting a group is irreversible. The group and all associated data is removed permanently.
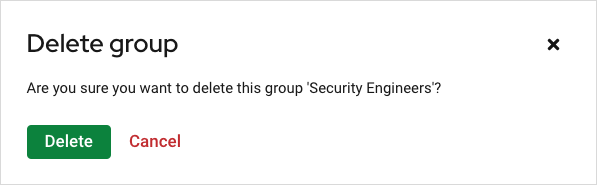
Fig. 4.10 Confirming the deletion
Click Delete.
→ The group is removed from OPENVAS SECURITY INTELLIGENCE.
4.3.4 Adding Users to a Group
Users can be added to a group as follows:
Select Settings > User Management in the menu.
→ The user management is opened in a new browser tab.
Select Groups in the menu.
Note
The pre-defined sub-groups within the Platform group are used for role assignment. By adding users to one of the sub-groups, the respective role is assigned.
Click on the name of the group/sub-group to which the users should be added.
Select the Members tab.
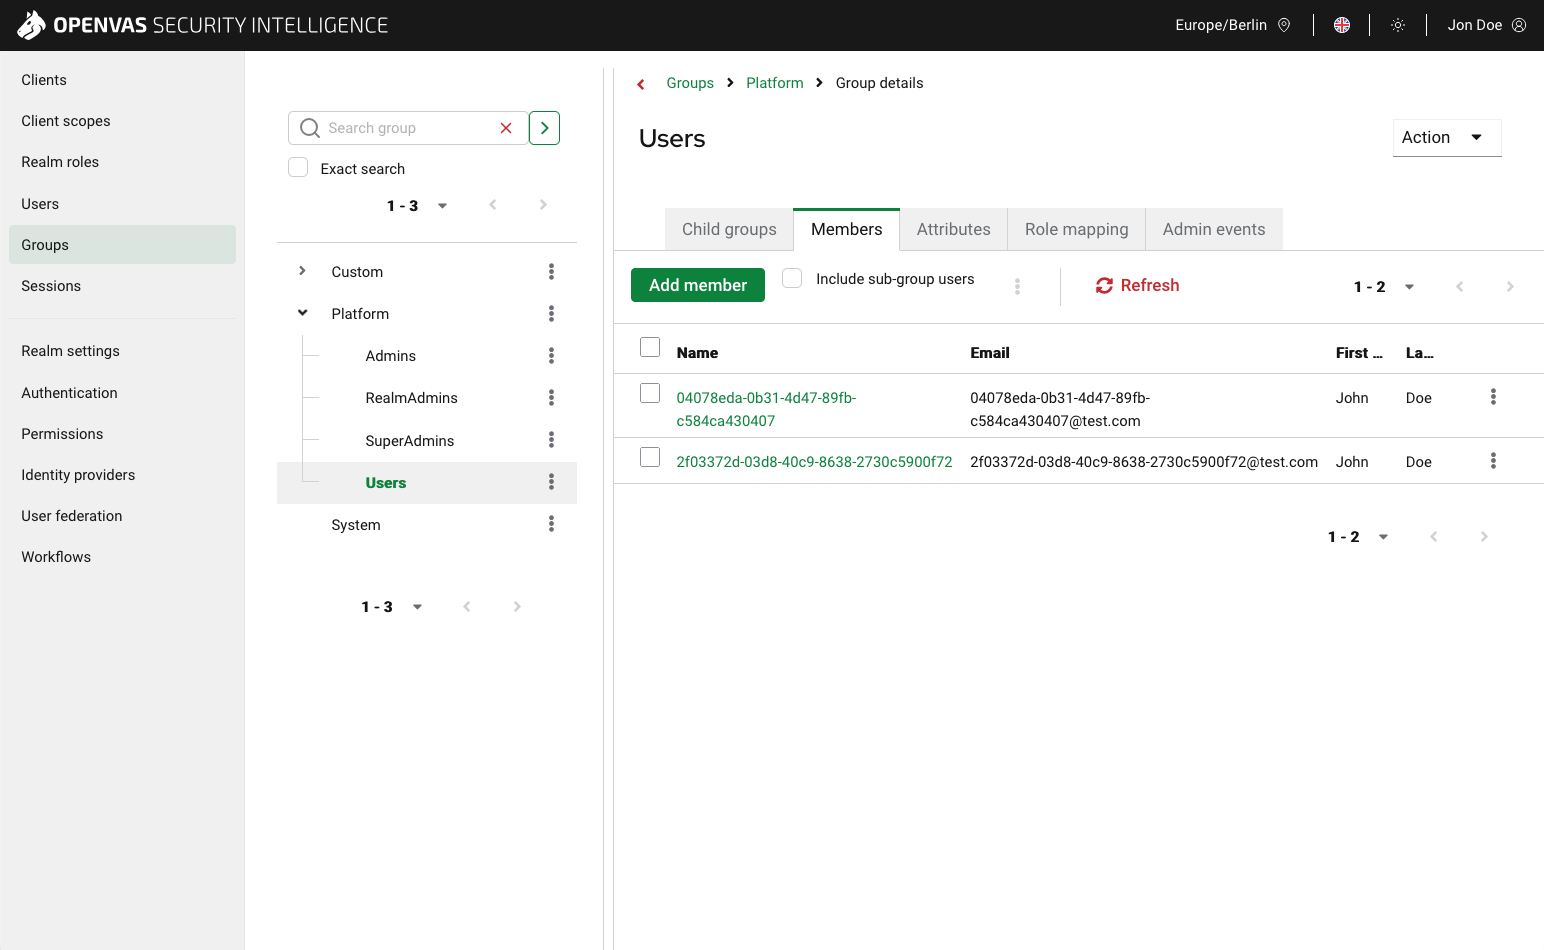
Fig. 4.11 Adding users to a group
Click Add member.
Activate the checkboxes of the users that should be added to the group.
Click Add.
→ The users are displayed in the member list.
4.3.5 Removing Users from a Group
Users can be removed from a group as follows:
Select Settings > User Management in the menu.
→ The user management is opened in a new browser tab.
Select Groups in the menu.
Click on the name of the group/sub-group from which the users should be removed.
Select the Members tab.
Activate the checkboxes of the users that should be removed from the group.
Click
in the top bar and select Leave from the drop-down list.→ The users are removed from the member list.
4.4 Configuring the Password Policy
The password policy specifies the requirements that login passwords must meet.
The password policy can be configured as follows:
Select Settings > User Management in the menu.
→ The user management is opened in a new browser tab.
Select Authentication in the menu.
Select the Policies tab.
Select the criteria for the password policy from the Add policy drop-down list.
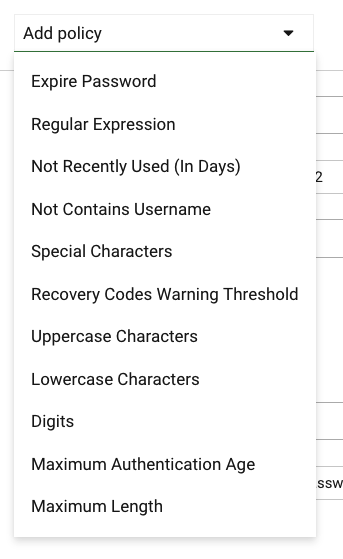
Fig. 4.12 Selecting the criteria for the password policy
Define the selected criteria.
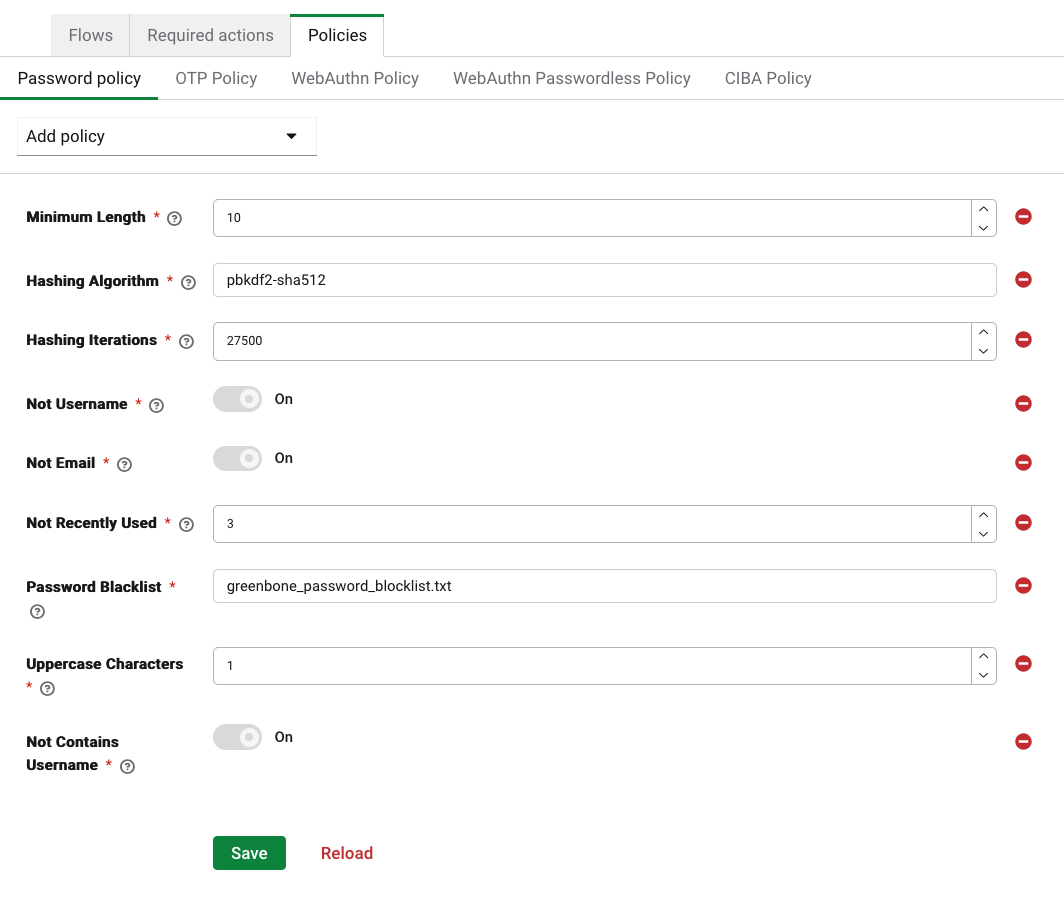
Fig. 4.13 Defining the criteria
Click Save.