4 Using OPENVAS REPORT
4.1 Supported Web Browsers
OPENVAS REPORT can be used with the desktop versions of the following web browsers:
Google Chrome
Mozilla Firefox
Microsoft Edge
The latest version and one major previous version of the browsers are supported.
4.2 Signing in to OPENVAS REPORT
OPENVAS REPORT can be accessed as follows:
Open the web browser.
Enter the IP address of OPENVAS REPORT.
Sign in using the user name and password of the OPENVAS REPORT account (see Fig. 4.1).
Note
When signing in for the first time, a new password must be set.
The password must fulfill the following criteria:
At least 10 characters long
Different from the user name
Different from the e-mail address
Different from the last three passwords
Not a common word that could be found in an English or German dictionary
Click Sign in.
→ The page that was last opened is displayed.
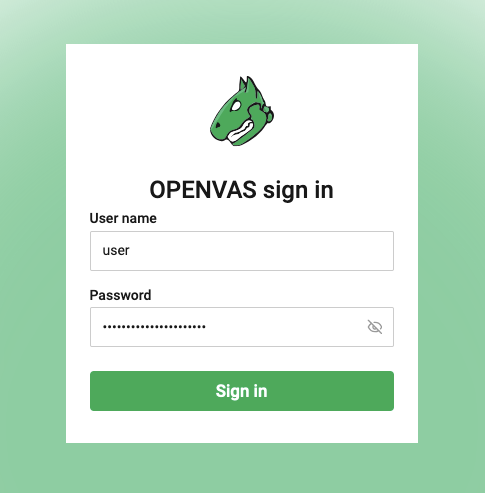
Fig. 4.1 Signing in to OPENVAS REPORT
4.3 Filtering the Page Content
The pages Dashboard, Assets and Vulnerabilities offer the possibility to filter the displayed content.
4.3.1 Applying a Filter
A filter can be selected and applied as follows:
Click inside the filter bar at the top of the page.
Select a filter attribute from the drop-down list.
For the filter attribute Tag, select the tag name from the sub-menu.
Note
If no tags are available (see Chapter 6.3), the Tag filter is not offered.
→ The applicable filter operators are automatically displayed in a second drop-down list (see Fig. 4.2).

Fig. 4.2 Available filter operators
Select a filter operator from the drop-down list.
→ Depending on the filter attribute selected in step 2, different options for specifying the filter value are displayed.
Specify the filter value (see Fig. 4.3).
In case of a free text, enter the text in the input box and select the text in the drop-down list that is opened.
In case of predefined options, select the desired option from the drop-down list that is opened.
In case of a date, select the date in the displayed calendar.
In case of a tag, select a tag value from the drop-down list.

Fig. 4.3 Specifying the filter value
Click outside the filter bar to apply the filter (see Fig. 4.4).

Fig. 4.4 Applied filter
Click All/Any at the left side of the filter bar to select the desired filter conjunction.
Note
If All is selected, only results that match all selected filter parameters are displayed.
If Any is selected, all results that match at least one of the selected filter parameters are displayed.
4.3.2 Saving Filters
Filters can be saved as follows:
Enter the desired filter parameters in the filter bar as described in Chapter 4.3.1.
Move the cursor over
 at the right side of the filter bar and click Save filter.
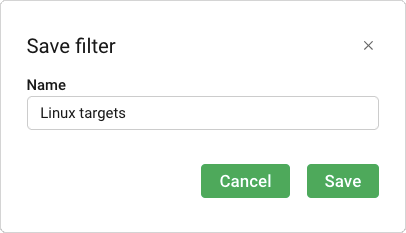
Fig. 4.5 Saving a filter
Enter a name for the filter in the input box.
Note
The filter name can contain any type of character and can be at most 255 characters long.
Click Save.
→ Saved filters can be used by clicking
 at the left side of the filter bar and selecting the desired filter from the drop-down list.
4.3.2.1 Updating Saved Filters
Filters can be updated as follows:
Click
at the left side of the filter bar and select the desired filter from the drop-down list.→ The filter is applied.
Add more filter criteria, or remove existing ones.
To overwrite the saved filter, move the cursor over
at the right side of the filter bar and click Save filter.or
To save the changed filter under a new name, move the cursor over
at the right side of the filter bar and click Save filter as.
Enter a name for the filter in the input box and click Save.Note
The filter name can contain any type of character and can be at most 255 characters long.
4.3.2.2 Deleting Saved Filters
A saved filter can be deleted by clicking ![]() at the left side of the filter bar and then clicking
at the left side of the filter bar and then clicking  for the filter in the drop-down list.
4.3.3 Overview of all Filter Options
The following table shows all filter options for each page of OPENVAS REPORT:
Filter Criteria |
Filter Operators |
|---|---|
Asset ID |
|
Host name |
|
IP address |
|
Last scan |
|
Operating system |
|
Appliance name |
|
Tag > Tag name |
|
Vulnerability name |
|
Severity |
|
QoD |
|
Solution type |
|
CVE |
|
CERT advisories |
|
Family |
|
Severity class |
|
EPSS score [%] |
|
EPSS percentile |
|
Filter Criteria |
Filter Operators |
|---|---|
Asset ID |
|
Host name |
|
IP address |
|
Last scan |
|
Operating system |
|
Appliance name |
|
Tag > Tag name |
|
Filter Criteria |
Filter Operators |
|---|---|
Vulnerability name |
|
Severity |
|
QoD |
|
Solution type |
|
CVE |
|
CERT advisories |
|
Family |
|
Severity class |
|
EPSS score [%] |
|
EPSS percentile |
|
Port/Protocol |
|
Filter Criteria |
Filter Operators |
|---|---|
Asset ID |
|
Vulnerability name |
|
Operating system |
|
Host name |
|
IP address |
|
Severity |
|
QoD |
|
Solution type |
|
CVE |
|
CERT advisories |
|
Family |
|
Last scan |
|
Appliance name |
|
Tag > Tag name |
|
Severity class |
|
EPSS score [%] |
|
EPSS percentile |
|
Port/Protocol |
|
Filter Criteria |
Filter Operators |
|---|---|
Description |
|
Level |
|
Name |
|
Occurrence |
|
Origin |
|
Filter Criteria |
Filter Operators |
|---|---|
E-mail address |
|
First name |
|
Last name |
|
User name |
|
4.4 Managing the User Settings
4.4.1 Changing the Language
OPENVAS REPORT is available in English and in German. The flag of the selected language is displayed in the upper right corner:
 If English is selected, the flag for the United Kingdom (UK) is displayed.
 If German is selected, the flag for Germany is displayed.
Click on the icon to change the language.
Note
OPENVAS REPORT saves the language setting for the next login.
4.4.2 Changing the Theme
OPENVAS REPORT supports a light and a dark color theme. The icon for the currently applied theme in displayed in the upper right corner:
 If the light theme is selected, the sun icon is displayed.
 If the dark theme is selected, the moon icon is displayed.
Click on the icon to change the theme.
Note
OPENVAS REPORT saves the theme setting for the next login.
4.4.3 Changing the Password
Every user can change their own password as follows:
Select User management > Personal settings in the menu.
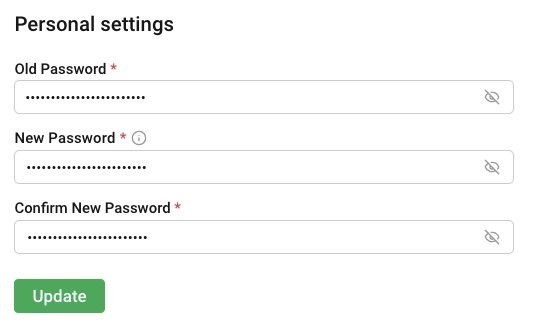
Fig. 4.6 Changing the password
Enter the current password in the Old Password input box.
Enter the new password in the New Password input box and confirm it.
Note
The password must fulfill the following criteria:
At least 10 characters long
Different from the user name
Different from the e-mail address
Different from the last three passwords
Not a common word that could be found in an English or German dictionary
Click Update.
Note
If a password is forgotten or lost, it can be reset by the web admin (see Chapter 3.5).
4.5 Managing the Global Settings
Note
Only the web admin is able to see and change the global settings.
4.5.1 Enabling the Automatic Removal of Assets
Inactive assets are assets for which the last scan was performed some time ago and which may no longer exist. These assets can be automatically removed from OPENVAS REPORT. The removal happens automatically once per day.
Note
The time of the last scan can be found, for example, on the Assets page in the Last scan column (see Chapter 6.2.2.1).
The automatic removal of assets can be configured as follows:
Select Global settings > Asset management in the menu.
Click on the toggle switch to enable the automatic asset removal.
Enter the minimum number of days since the last scan of an asset for it to be automatically deleted.
Note
Values from 1 to 365 can be entered.
Assets for which the last scan was performed earlier than the specified number of days are removed.
Example: if the value
30is entered, assets that were last scanned 31 days ago or earlier will be removed.Click Save.
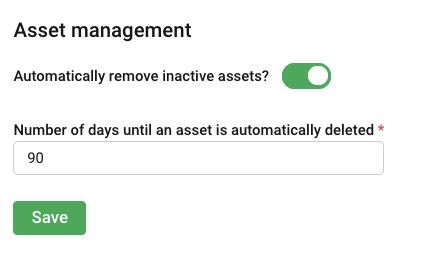
Fig. 4.7 Enabling the automatic removal of assets
4.6 Opening the User Manual
The user manual can be opened by clicking  in the upper right corner.
4.7 Signing Out of OPENVAS REPORT
Signing out of the platform can be done by moving the cursor over the user name in the upper right corner and clicking Sign out (see Fig. 4.8).
If no action is performed on the platform for 30 minutes, the user is signed out automatically.
The remaining time until the user is automatically signed out is displayed next to the user name in the upper right corner. By clicking anywhere on the platform, the timeout can be reset.
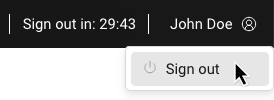
Fig. 4.8 Signing out of OPENVAS REPORT